


Hi me Rupak Nepali again, today I am going to cover OpenCart OCMOD documentation and tutorial for the developer and show how to start coding in OCMOD to change the files and extend functionalities. How are OCMOD code flows described here?
OCMOD is based on Qphoria’s VqMOD system.
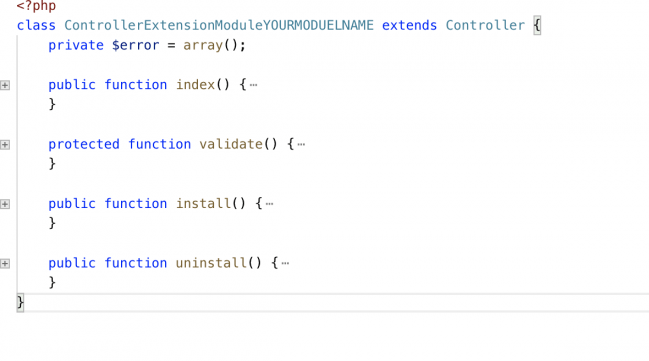
Opencart 3 install uninstall method in OCMOD
The detailed documentation of
Both have the same functionalities, you have to install VqMOD in OpenCart 3 and OpenCart 2 but OCMOD is by default in OpenCart 3 and you can easily upload from the admin sections.
The main feature differences for the programmers are:
Both
Replace, Before, After, Regex, Offset, Limit,
Missing in OCMOD which had in VqMOD are:
Attributes top,
The file and folder structure to create OCMOD in OpenCart 3 are like below:
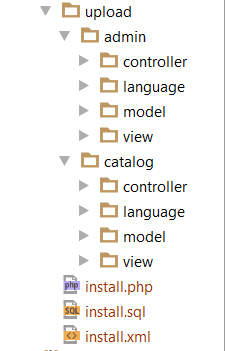
- The File structure of OCMOD compressed zip ocmod.zip files may look like below but can differ as per the functionalities of the module
- For an OCMOD file to be uploaded the file extension must be either .ocmod.zip or .ocmod.xml.
File Structure
- Example file structure for OCMOD compressed files.
- upload
- install.sql
- install.php
- install.xml
upload
- All files under this directory will be uploaded to the directory of your OpenCart installation.
install.sql
- Add any create, drop, insert, and update SQL queries here. Make sure each query ends with the following;
install.php
- If the modification requires any custom PHP code.
install.xml
- The XML modification file. You can view the documentation for this system below.
https://github.com/opencart/opencart/wiki/Modification-System
Demo to install the OCMOD
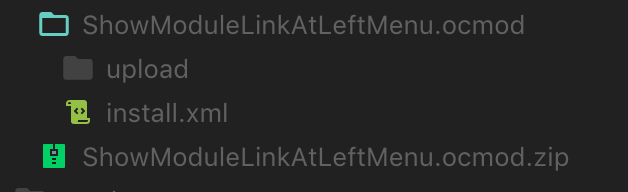
- Let’s install ShowModuleLinkAtLeftMenu module which is developed by webocreation.com
- Here you can see only the install.xml file as it does not upload any files The file changes the core files.
- Download the opencart module Show Module link at Left Menu for free
- Admin >> Extensions >> Extension Installer (upload ShowModuleLinkAtLeftMenu.ocmod.zip here) then to modification and click refresh.
Let's see XML example of the module install.xml
    Show Module Link At Left Menu
    3.0
    Rupak Nepali
    https://webocreation.com
    webocreation_show_module_link_at_left_menu
    Show module link at left menu


            user->hasPermission('access', 'marketplace/extension')) { ]]>
                            $marketplace[] = array(
                    'name'     => "Modules",
                    'href'     => $this->url->link('marketplace/extension&type=module', 'user_token=' . $this->session->data['user_token'], true),
                    'children' => array()
                );
            ]]>
Tags
You can set multiple file locations by spiting up the file locations using commas. The modification system uses the PHP function glob.
Direct file path.
Using braces allows for selecting multiple files and not having to repeat the code operation multiple times.
also allows braces
Please note that all file paths must start with either admin, catalog or system. You can also use a wildcard to search for multiple directories and files.
Search
Search code
Allowed Attributes
- trim="(true|false)"
- regex="(true|false)"
- index="(number)"
Example:
    Modification Default
    1.0
    OpenCart Ltd
    http://www.opencart.com
    webocreation_mod_1


            load->controller('common/column_left');
            ]]>
Add
The code to replace the search with.
Allowed Attributes
- trim="(true|false)"
- position="(replace|before|after)"
- offset="(number)"
(note position can not be used if regex is set to true in the search attribute).
Example
    Modification Default
    1.0
    OpenCart Ltd
    webocreation_modification_default
    http://www.opencart.com


            load->controller('common/column_left');
            ]]>
Regex
Allowed Attributes
- limit="(number)"
Example:
    Regex Example
    1.0
    OpenCart Ltd
    webocreation_regexexample
    http://www.opencart.com
If you use a regex you can not use attributes position, trim or offset as these are handled by the regular expression code you write. The limit attribute is still available.
If, for example, you want to change the 3rd 'foo' to 'bar' on the following line:
lorem ifoopsum foo lor foor ipsum foo dolor foo
^1      ^2      ^3         ^4        ^5
Run:
s/\(.\{-}\zsfoo\)\{3}/bar/
Result:
lorem ifoopsum foo lor barr ipsum foo dolor foo
^1      ^2      ^3=bar     ^4        ^5
Let us know if you have any more ideas.


